AmateurLogic 62
It's Alive!
Show Hosts
- George Thomas (W5JDX)
- Tommy Martin (N5ZNO)
- Peter Berrett (VK3PB)
Topics
- Peter does some time lapse photography with the Raspberry Pi camera module.
- Tommy reviews the new DHAP. A Hardened case, computer, power supply and more for your D-Star DVAP access point.
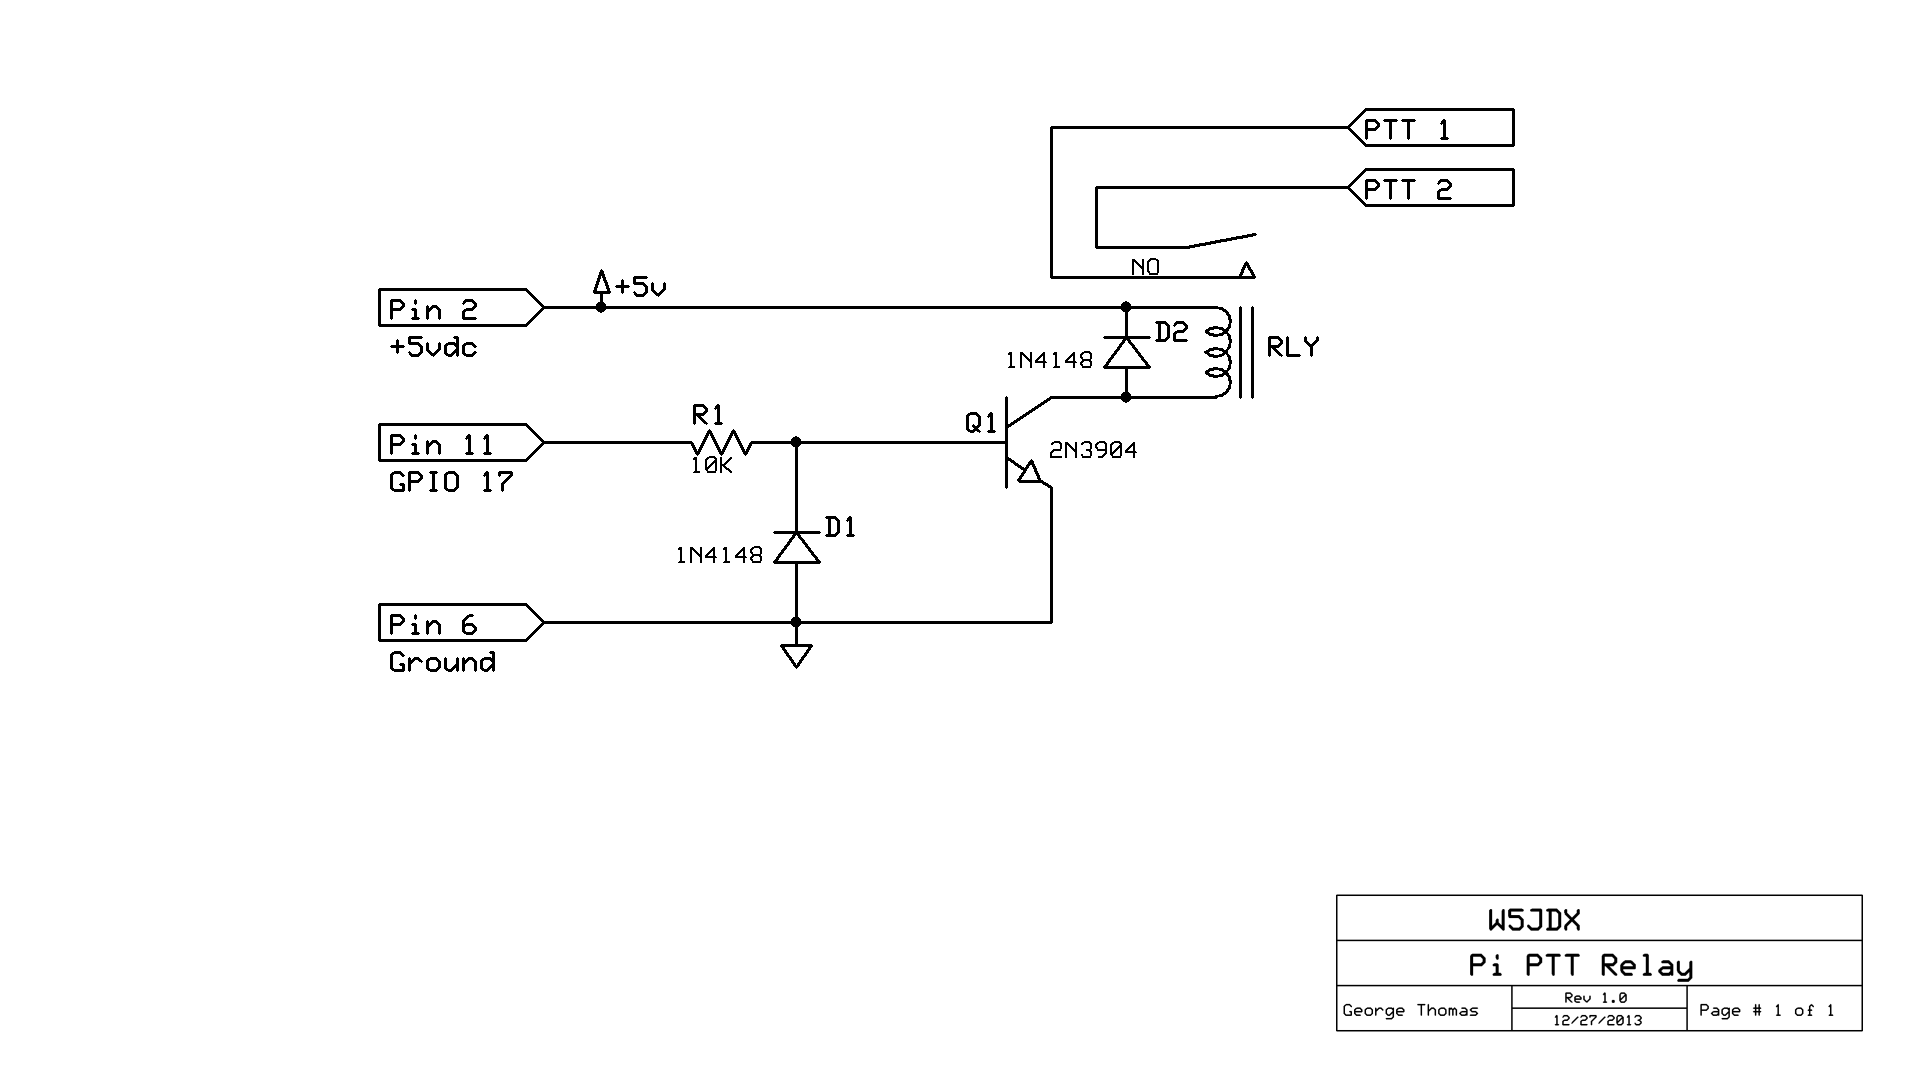
- George gets the Raspberry Pi Echolink node on-the-air. Solving the GPIO problem, building a relay interface for the Pi, and using a Circuit Writer pen to create a PC board.
Instructions re Timelapse camera
You need - Raspberry Pi (preferably model B so you can connect to the internet) - wireless keyboard - Battery pack used for charging mobile phones - Milo tin or equivalent - 8Gb or bigger SDHC card - raspberry pi camera board
Instructions
1. Using an adapter flash the most recent version of Raspian onto the card (in Windows I use the program win32diskimager http://sourceforge.net/projects/win32diskimager/) 2. Hook up keyboard, sdhc card, montitor etc to the PI and it should boot into the settings screen. Follow instructions in ep 62 to install camera board (i.e. blue tab faces away from hdmi connector) 3. In the settings enable the camera, overclock the Pi to whatever you want (I used 950 mhz) and expand the partition out to fill the card 4. /sudo reboot 5. You should now be at the command prompt. Change to the pi directory using:
/home/pi
6. Fetch the first file (note the capitalisation)
sudo wget http://www.amateurlogic.tv/downloads/raspiLapseCam.py
7. Make it executable
sudo chmod 755 raspiLapseCam.py
8. Change directory:
/etc/init.d
9. Fetch other program
sudo wget http://www.amateurlogic.tv/downloads/timelapse
9. Make it executable
sudo chmod 755 timelapse
10. Make the program start at boot
sudo update-rc.d timelapse defaults
11. Make hole in tin for camera and sticky tape camera in place.
12. Insulate board from tin (put it in a plastic case then put in tin)
13. Wireless keyboard usb dongle needs to be connected as well
14. Hook up battery pack to Pi, wait 40 seconds and then type a name on keyboard. When you hit 'enter' the light on the camera board should come on for a few seconds. It will do this once a minute.
15. Put lid on can and leave
16. Some time later remove battery and, using a linux system or special windows driver, access linux file system on sdhc card (will be in a directory off root directory)
17. Transfer files to a windows directory and then stitch the series of images together into a movie using a program called Photolapse http://home.hccnet.nl/s.vd.palen/index.html
Enjoy!
Links
Sponsors
- GigaParts http://www.gigaparts.com/altv For special deals on Icom Radios, Raspberry Pi and Arduino kits.
- MFJ Enterprises Inc. http://www.mfjenterprises.com
- Icom New Year Instant Savings http://www.icomamerica.com
After Show Net
- Dodropin* (Echolink node 355800)
- January 20, 8:30PM CST